
I recently wrote a couple of blogs for my Fujifilm community over at Fuji X Aus. In those interviews I chatted with a bunch of very different photographers to get an idea on how they utilise the tools they have to manage their workflow. I guess workflow means different things for different people. For me it is about the processes I generally follow before, during and after a shoot. Or preparation, production and post processing. Regardless of if that shoot is for a more serious event or just my casual street photography. In conducting those interviews I was able to share with everyone how people make the most with what they have to generate a workflow. If you are interested in those blogs, as well as a bunch of other blogs, then take a look at the blog section of the Fuji X Aus website here. I write on that site fairly regularly.
I would imagine that some people have very different workflows if they are professional photographers shooting really important events and projects. For example, if you were a wedding photographer, then your workflow would have to include processes for ensuring you captured and recorded the images effectively as well as ensuring a back up process for the images after the event. Of course there would be many more processes to the workflow of someone shooting such a critical event. They would have a flow and plan for the day, etc. A flow for how they edit and present their images to a client. And so on. More of a commercial workflow I guess. Then you look at the workflow of someone that is a casual street photographer. They may not have much of a workflow at all. They may have a general plan for their time out shooting. And the post processing flow may have some key steps. But it is certainly not as critical or high risk as my prior example.
For me, I sit somewhere in the middle and to be honest my workflow is pretty much the same regardless of if I am shooting street for fun or photographing a paid event. I apply the same process in my photography trips to Japan where I am taking thousands of photos. And I suppose that level of consistency allows me to be more efficient in how I work. Let’s take a closer look at my preparation workflow.
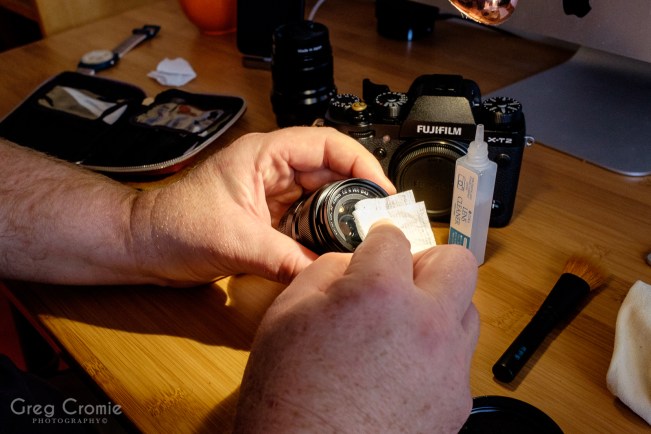
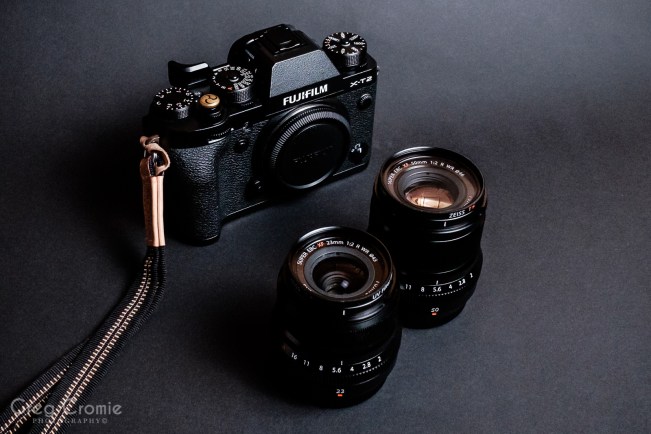
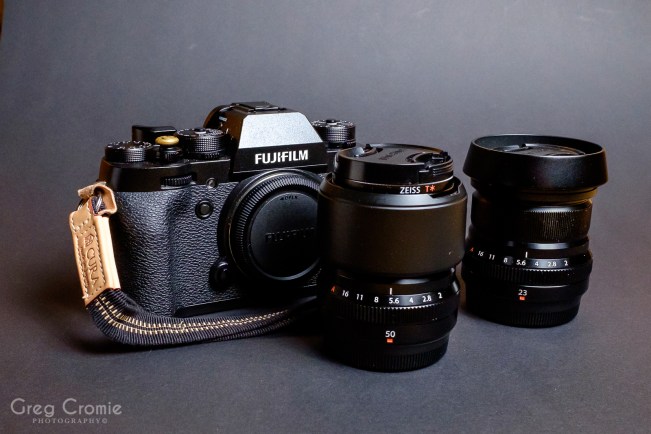
I have talked in past blogs about what’s in my camera blag and what I use on various shoots. In those blogs I probably had more camera gear to choose from. Since then I have streamlined my kit quite a bit as I have found a nice balance in what works for me. Preparation is paramount to a successful workflow and a successful shoot. I clean all my gear first and foremost. I clean my lenses and ensure that front and back glass are clear. You can check out a bit more about my cleaning gear here. I also ensure that my camera sensor is clean and dust free. Nothing worse than getting back from a shoot only to find you have a dust spec in every image you have taken. And obviously I make sure that I pack all my gear into the most appropriate bag for the situation. For both street and event work, I will generally pack my Fujifilm X-T2 with the XF23mmF2 and the XF50mmF2 lenses. They are small, light and all weather resistant. I also always pack my Fujifilm X70 mostly as a back up for events.
This may seem like an obvious one, but it has happened to almost every photographer I know at some point in time. Charge your batteries and ensure that you have spares packed and that they are fully charged too. Not so big a deal for a casual shoot with mates. But can you imagine showing up to shoot an event and you haven’t got enough batteries to make it through the day. And if you are planning a long full day and possibly night shoot for an event such as a wedding, then pack your charger. For me, I am shooting mostly with the Fujifilm X-T2 and depending on the lens I am using, I can get 300-500 shots from a single battery. For important events I will pack three spare batteries. For a street shoot, perhaps one spare. I also pack two spare batteries for my Fujifilm X70. Batteries don’t take up much room so throw them in your bag.

And the same kind of process applies to SD cards. They take up hardly any room in your bag so pack more than you need. Make sure that they are all blank and have been formatted in-camera. Even if they are brand new. My Fujifilm X-T2 has dual card slots. So I can easily get through a full event without having to touch a spare card. And this is a really important part of my workflow. I shoot all my images in RAW with Lossless Compression. Fujifilm cameras produce exceptional straight out of camera JPEGs. But I choose RAW as there is much more I can do with them in post processing. More on that later. The great thing about my Fujifilm X-T2, is that I have options about how I use the dual cards. There are three options. Sequential – this is where the camera will save all images to one SD card until that SD card is full and then it will automatically start to save images to the second SD card. Backup – this is where the camera will make a copy of the same image to each of the SD cards. That way, if you have an SD card failure (rare but not impossible) you have a back up. And finally RAW/JPEG. In this mode the camera will save a RAW version of the image to one card and a JPEG version to the other card. This gives a lot of flexibility to those that like to have immediate access to the JPEG images but also like the potential to further edit images from RAW later on.

For casual shoots I will have my camera set to the Sequential option. I don’t need a back up. But when shooting an event or even on my trips to Japan – where my ability to recapture a lost image is impossible – I will always use the Backup version. It does mean that I am technically going through twice as many SD cards but the peace of mind and insurance of having two copies is far more important. As for my SD choices, I use SanDisk Extreme Pro. In my Fujifilm X-T2, I have two 64GB cards in at the same time. And on each card I can capture approximately 2,500 RAW images. If shooting in Sequential, then that is 128GB of storage and 5,000 RAW images. That’s a lot of images. With that in mind, I will generally carry two extra 64GB SD cards as spares or in the case of my Japan trips, four extra 64GB SD cards and a couple of 32GB SD cards also. Like I said they don’t take up much room and it is better to be safe than sorry.

My final preparation is to do a once over of my camera’s settings. I make sure that I am in a neutral set of functions. Shutter Speed, ISO, Exposure Compensation, Focusing Mode and the above save data settings are all where I like them. So that technically when I start my shoot I can pull my camera out of the bag and start taking shots straight away. And that brings me to the end of part I of this mini-series on my workflow. I feel that, like with many important tasks we undertake, that preparation is really important. It gets you into a primed position to ensure that you capture the images you want – wether it be for fun or for something more serious. And if you are doing a semi-professional paid job then it makes you look all the more professional to arrive at an event and be ready to start the minute you walk in the door. Obviously you need to make do with what you have available. Spare batteries and SD cards I have built up over years, but they are expensive. So if you only have the one SD card of perhaps one battery. Then still apply the same practices I have described above. I hope that this has been of some benefit to you. Happy shooting.


5 Responses to My photography workflow with Fujifilm X Series – Part I – Preparation.
Reblogged this on My Fuji Life.
LikeLike
Great article, Greg. I am confused about compression, you say lossless is best . I shoot only in RAW and. I Use Xt1 and XT2
LikeLiked by 1 person
Thanks Pauline. I have always been told that lossless compression from Fujifilm cameras is no different to compressed but it gives you a smaller file size. I use this on my XT2.
LikeLike
[…] – be it for leisure or for a more important occasion. You can check out Part I of that series here. In it, I discuss my preparation workflow – the steps and checks I put in place as a matter […]
LikeLike
[…] some small differences in my processes and I will go through those here again just as I have with Part I and Part II of this blog […]
LikeLike